How to Edit a Demographic
| Choose a Demographic to Edit |
| Edit Demographic Details |
| Save Your Changes |
Editing demographics in Qualta AI allows teams to keep participant data up to date as project needs evolve. With the Demographics tab, custom demographic options can be quickly updated to reflect new requirements or refinements.
This article explains how to edit a demographic field, which options are editable, and how to make and save changes efficiently.
Only Managers, Administrators, and Team Owners may manage demographics.
Choose a Demographic to Edit
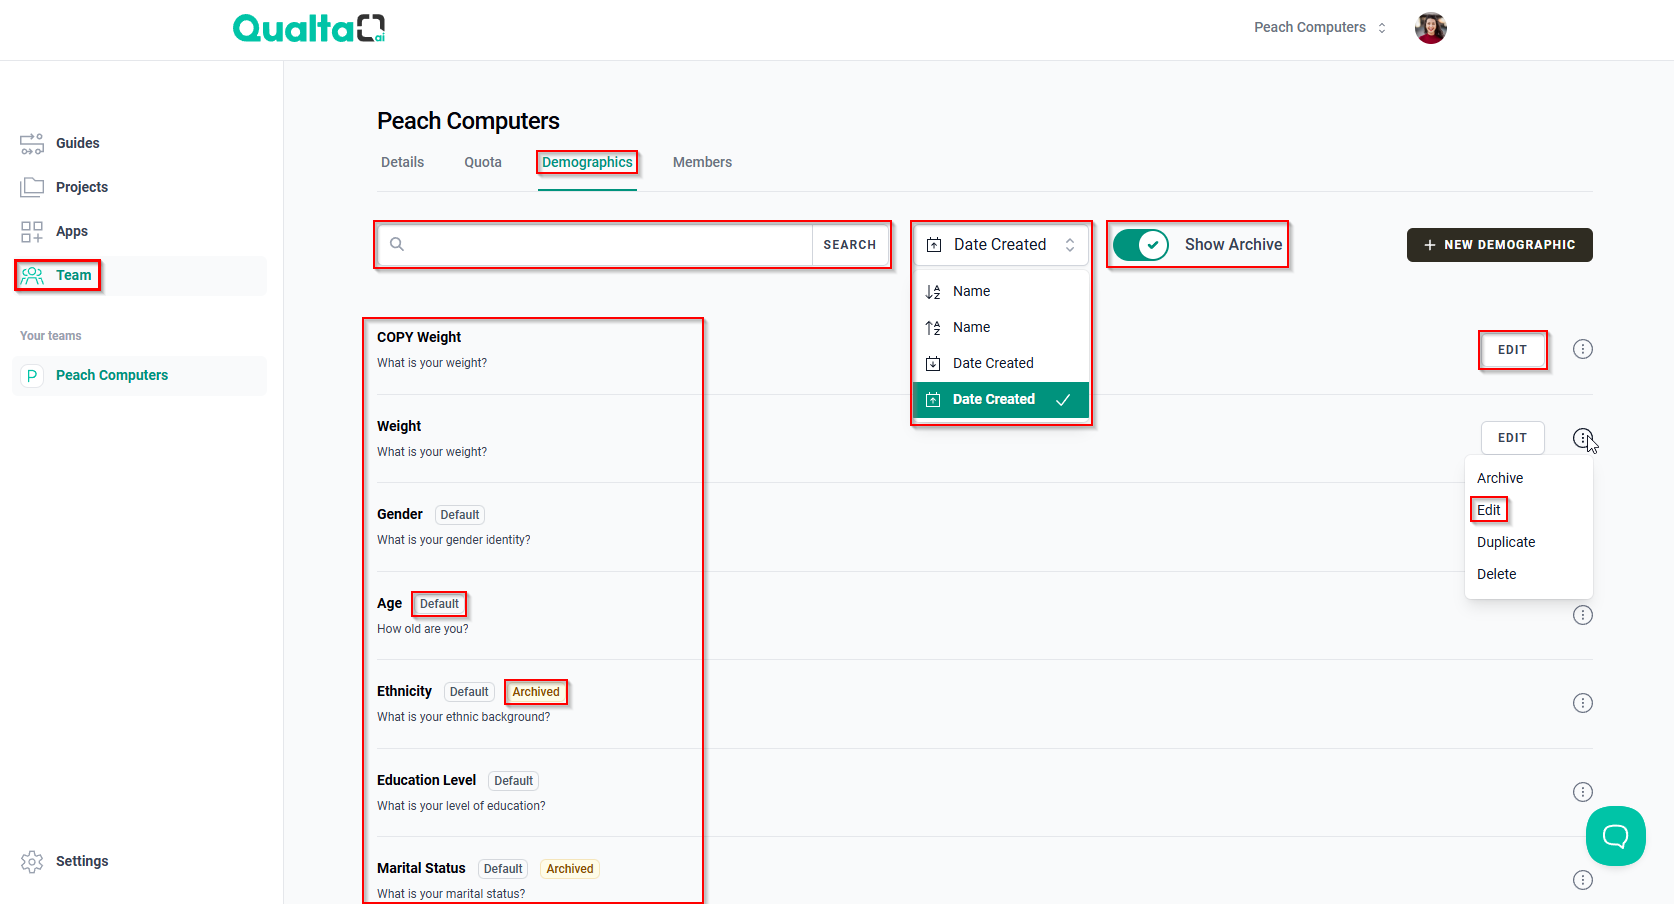
- First, go to the Team page in the navigation menu.
- Next, select the Demographics tab to view existing demographic options.
Custom demographics will NOT have the Default badge next to their name. Only these custom demographic fields can be edited directly.
Default demographics cannot be edited or deleted; only duplicated or archived.
- In the Demographics tab, use the SEARCH bar to locate the specific demographic you wish to edit by name.
- Alternatively, use the sorting options menu to sort demographics by Name or Date Created.
- If needed, toggle Show Archive to include archived demographics in your search.
Archived demographics will appear with an Archived label.
- Click EDIT to the right of the custom demographic you want to update.
- Alternatively, hover your mouse pointer over the More options icon (three vertical dots) to the right of the custom demographic you want to update, then click Edit.
Edit Demographic Details
After clicking EDIT on a custom demographic, the Edit Demographic page opens.
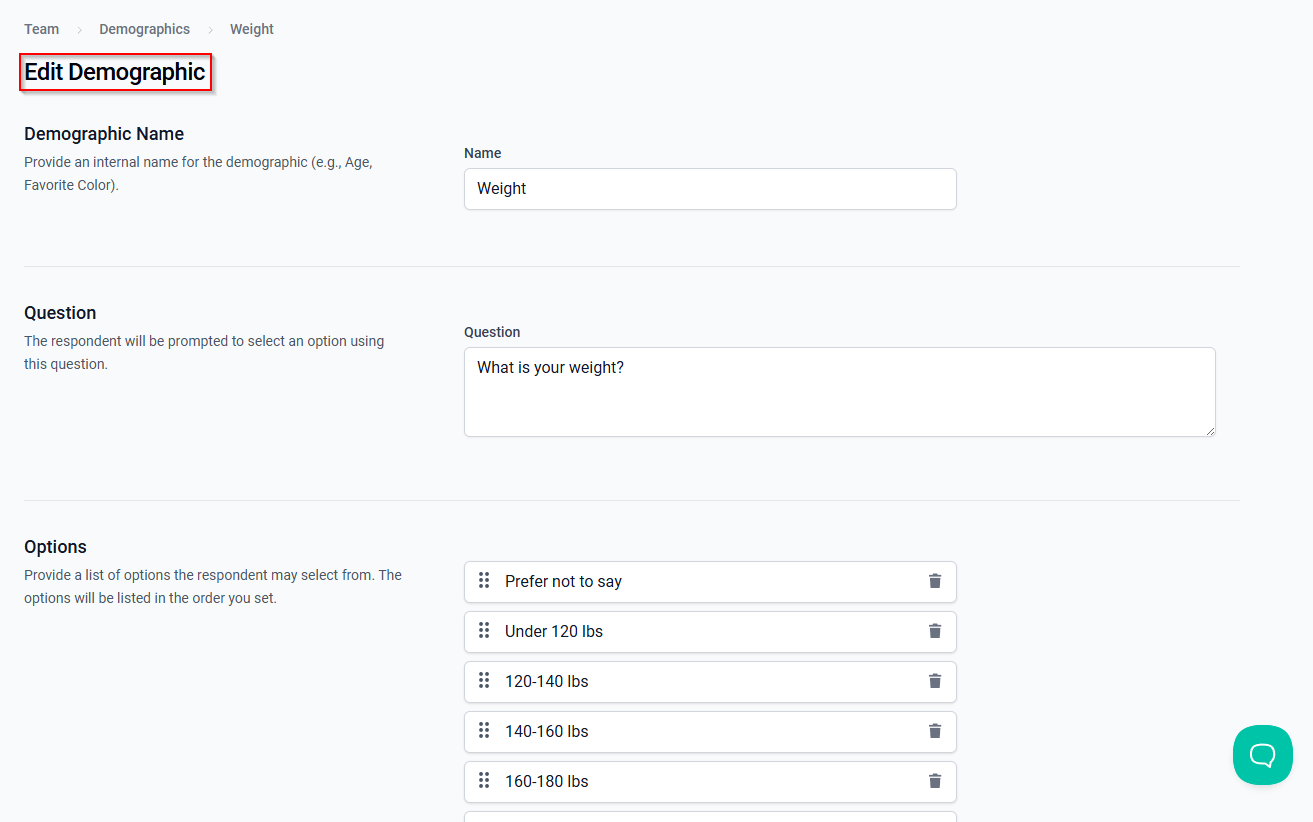
Under Demographic Name, update the internal name for the demographic in the Name field as needed.

In the Question field, revise the prompt respondents will see when selecting this demographic.

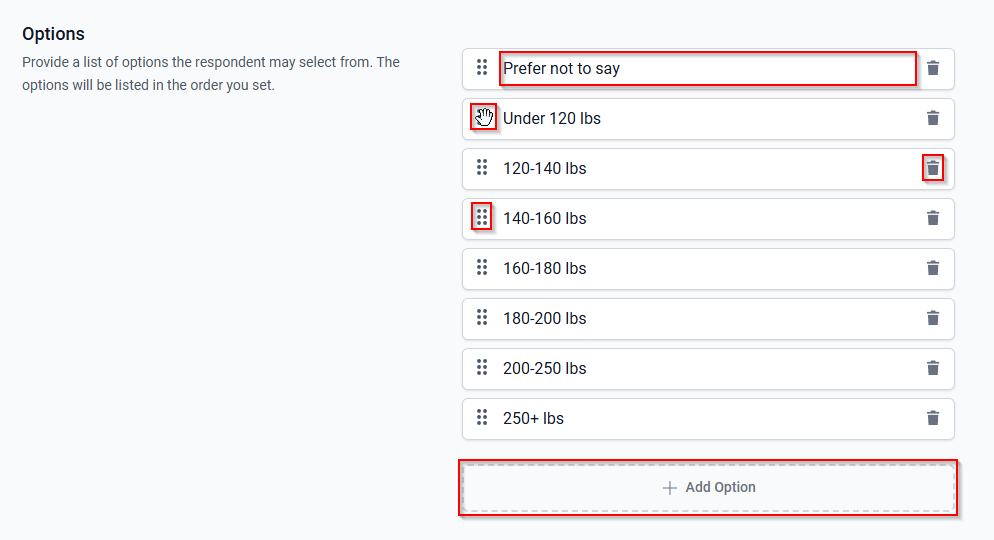
Under Options, modify the answer choices by editing, adding, removing, or reordering the available options.
- To edit an option, click on it and make the desired changes.
- To add a new option, select + Add Option at the bottom.
- To remove an option, click delete (trash icon) next to it.
- To reorder the options, hover your cursor over the drag handle (the six-dot icon) next to an option. The pointer will change to a grip icon, allowing you to drag the option to a new position in the list.
If you remove an option that has already been used in Guide responses, it will be archived in Qualta AI's system. However, this option may still appear in interview response listings and data exports to preserve historical accuracy.
Save Your Changes
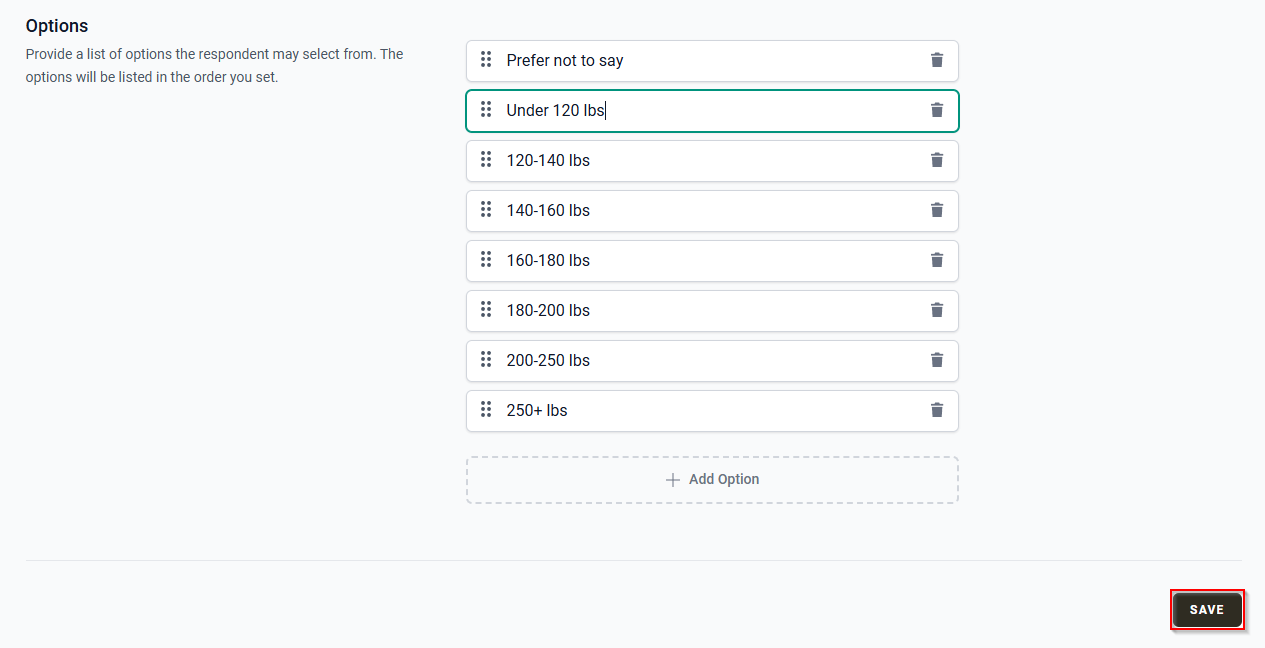
After making all desired edits to the Demographic Name, Question, and Options, click SAVE at the bottom right of the page.
Your changes will be applied immediately and reflected wherever the demographic is used within Qualta AI.
If you decide not to apply your changes, you can navigate away from the page without saving to discard edits.