
How to Edit a Project
| Edit a Project |
| Update the Description |
| Update Project Limits (Enterprise only) |
| Update Project Branding (Enterprise only) |
| Update Project Members (Enterprise only) |
| Finish Editing |
You can edit an existing Project to update its name, description, limits, branding, and members.
Projects are available on Pro and Enterprise plans. Project Limits, Branding, and Members are available on Enterprise plans only.
Edit a Project
To edit an existing Project:
- Navigate to Projects from the main navigation menu.
- Locate the Project you want to edit. Use the SEARCH bar, the sorting options, or the Show Archive toggle if needed.
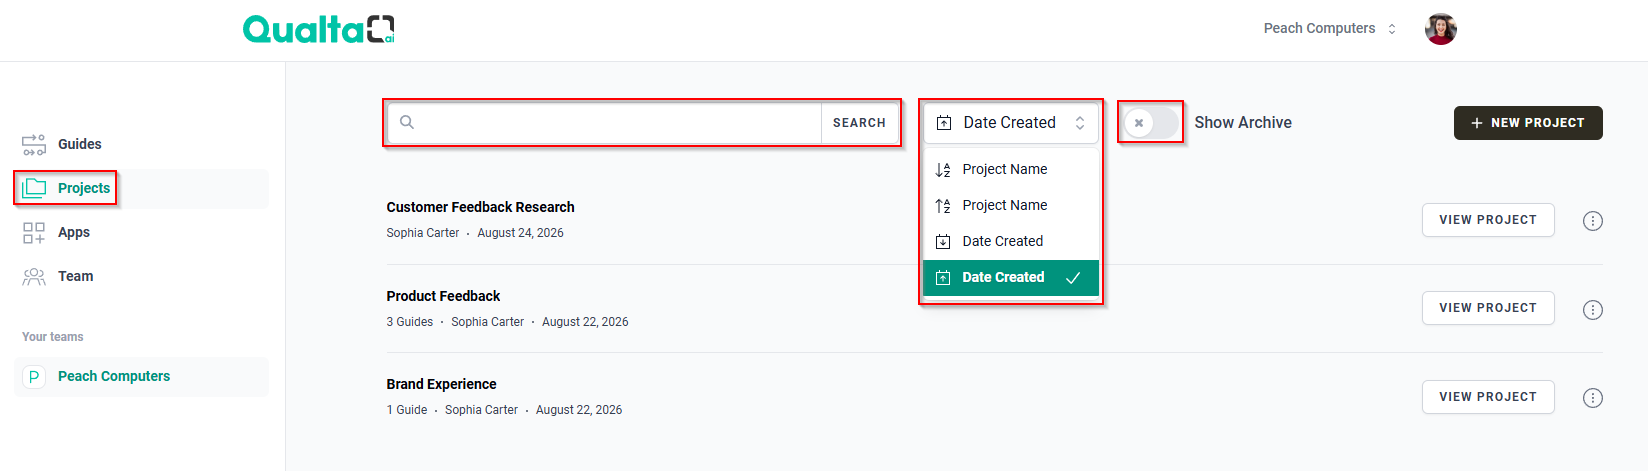
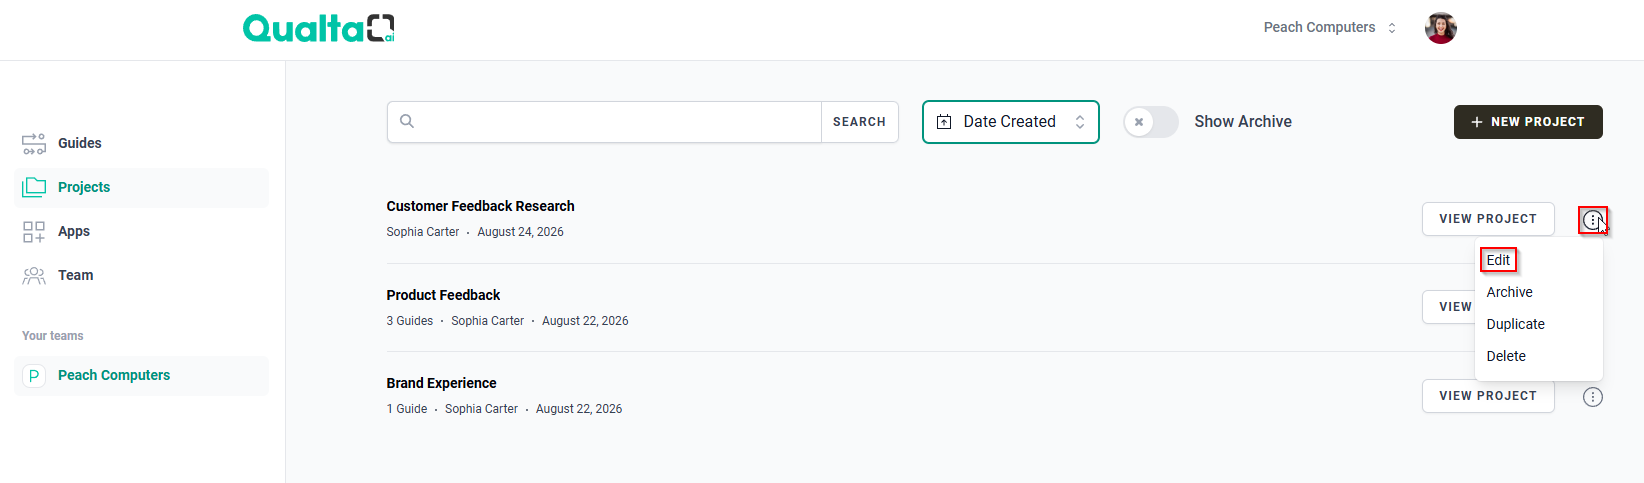
- Hover over the More Options icon for the Project.
- Select Edit.
Edit Project Screen
The Edit Project screen uses a vertical-tab layout with the following sections:
- Description
- Limits (Enterprise)
- Branding (Enterprise)
- Members (Enterprise)
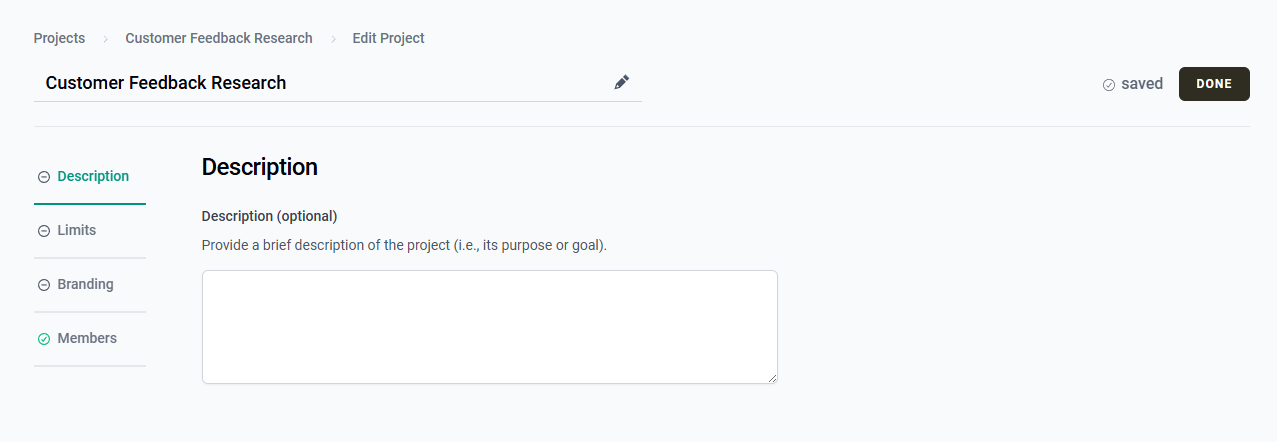
Changes made on the Edit Project screen are saved automatically shortly after you stop typing or editing. A "saving" or "saved" status appears in the header. Hover over the "saved" status to view the "Last save ..." timestamp.

The Project name can also be edited directly in the header and is saved automatically.
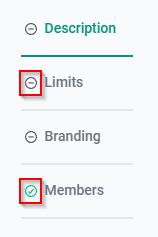
Each tab displays a status icon indicating whether it contains content. A filled check appears when the tab has content, while an outline "minus" appears when it is empty.
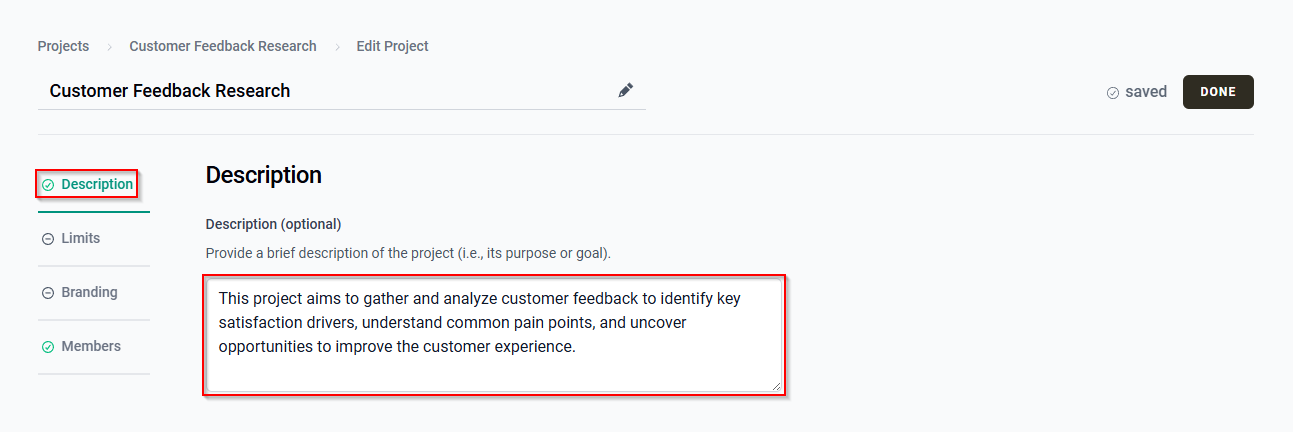
Update the Description
To update the Project description:
- Select the Description tab.
- Update the description, if required.
Update Project Limits (Enterprise only)
If you are using an Enterprise plan, you can update the Project Limits.
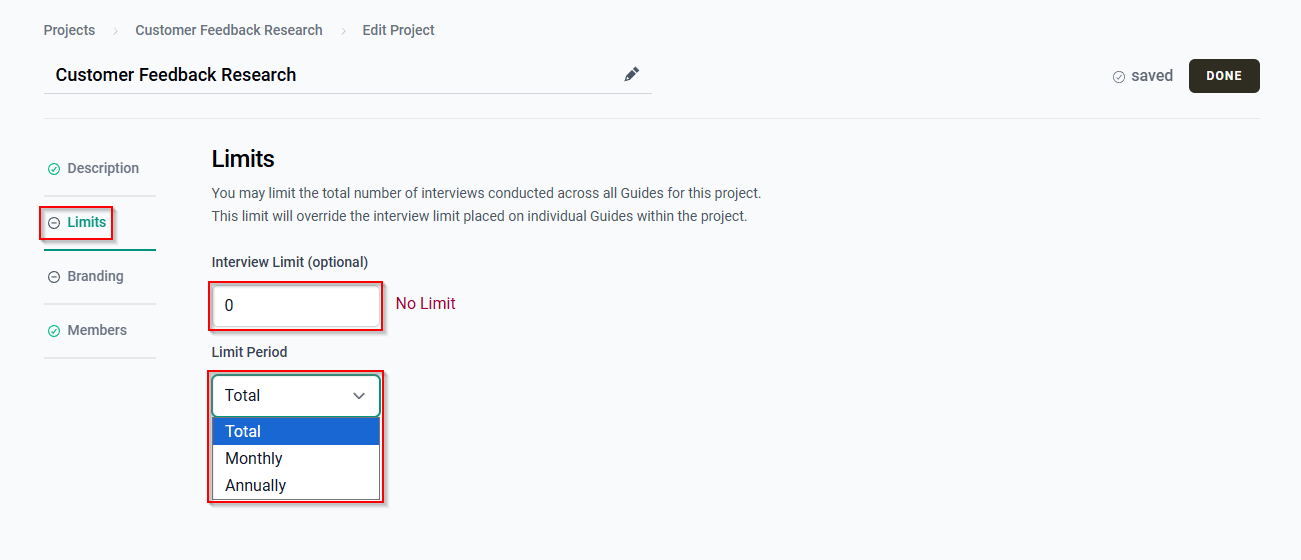
Project Limits control the total number of interviews that can be conducted across all Guides within a Project. The Project Limit takes precedence over any interview limits configured for individual Guides.
Example: A Project contains two Guides with a Project Limit of 40 total interviews. If one Guide has already collected 30 interviews, the remaining Guide can collect only 10 more interviews.
- Select the Limits tab.
- Update the following settings as needed:
- Interview Limit: Enter the maximum number of interviews allowed across all Guides in the Project. Enter 0 to remove the interview limit. The maximum value is 65,000.
- Limit Period: Select how often the interview limit resets.
- Total: The limit applies to the total number of interviews conducted over the lifetime of the Project.
- Monthly: The limit applies to the number of interviews conducted in the last 30 days.
- Annually: The limit applies to the number of interviews conducted in the last 365 days.
Update Project Branding (Enterprise only)
If you are using an Enterprise plan, you can customize the branding for an individual Project.
- Select the Branding tab.
- Configure the branding settings as needed:
- Logo: Upload a light-mode and/or dark-mode logo.
- Color Palette: Select a color palette for the interview interface.
- Background Pattern: Select a background pattern for the interview interface.
- Customize: Select button colors for light and dark modes.
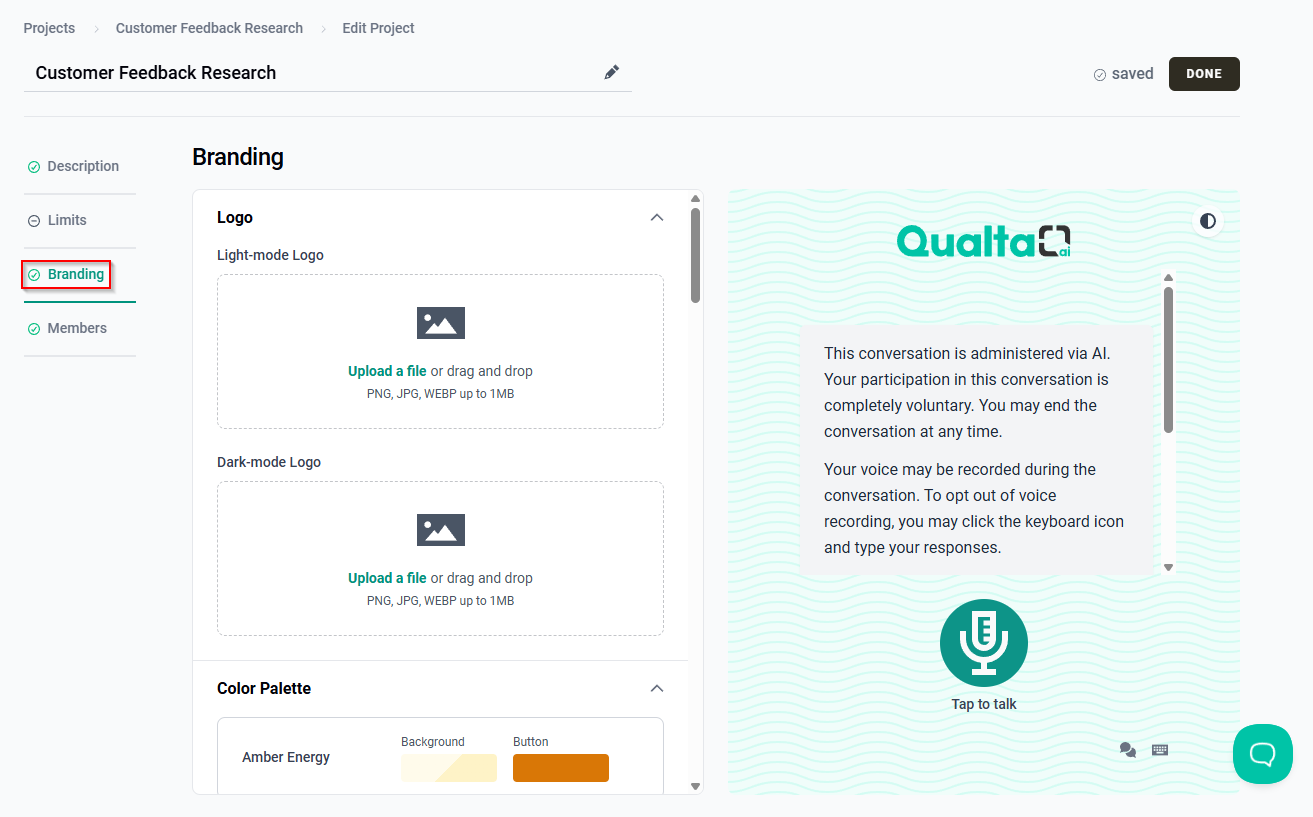
Project branding takes precedence over Team branding for the Project. Projects without Project branding continue to use Team branding.
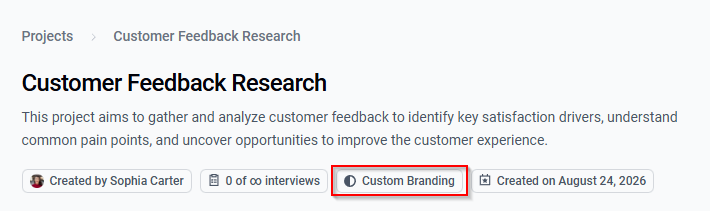
When Project branding is configured, a Custom Branding badge appears on the Project Overview.
The branding options and controls are the same as those available through Team Settings —> Branding. For detailed information about these options and controls, see How to Manage Custom Branding, which covers Team Branding.
Update Project Members (Enterprise only)
If you are using an Enterprise plan, you can update the Project Members.
- Select the Members tab.
To add a Project Member:
- Begin typing a team member's name, email address, or team role in the Member field.
- Select the team member from the list of matching results.
- Select a Project Role from the dropdown.
- Select ADD.
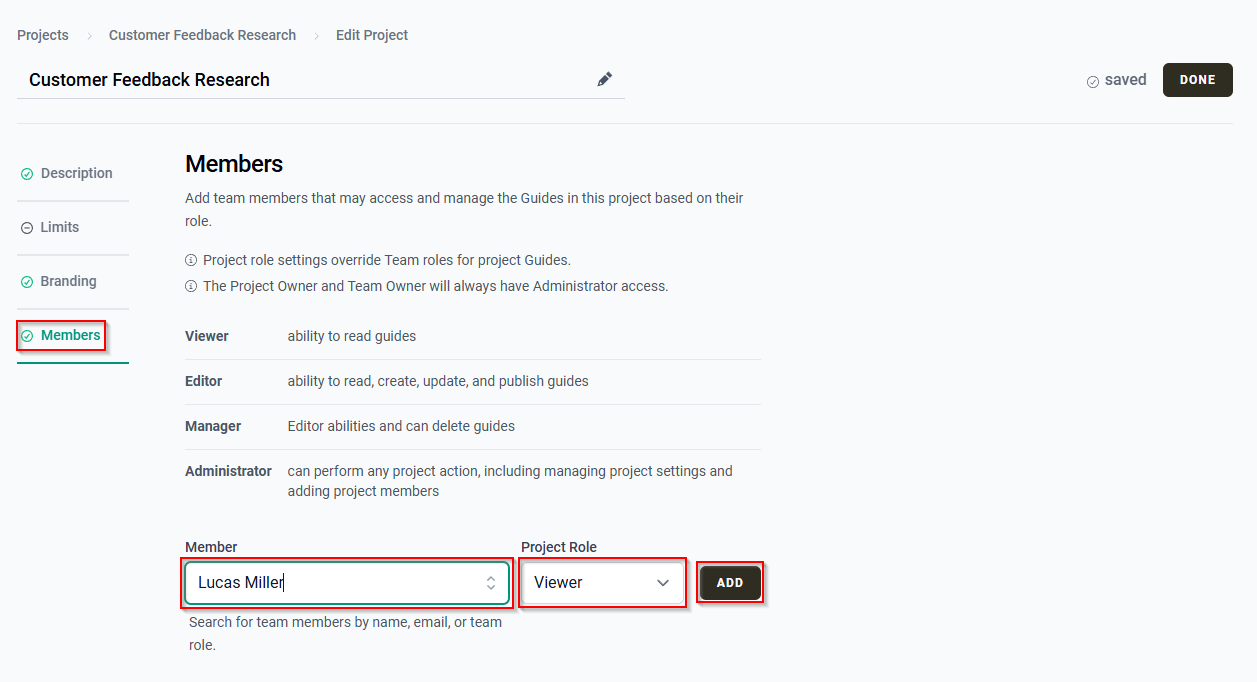
The selected team member appears in the Added Members list.
To change a Project Member's role:
- In the Added Members list, select a new Project Role from the dropdown.
To remove a Project Member:
- In the Added Members list, select Remove next to the team member.
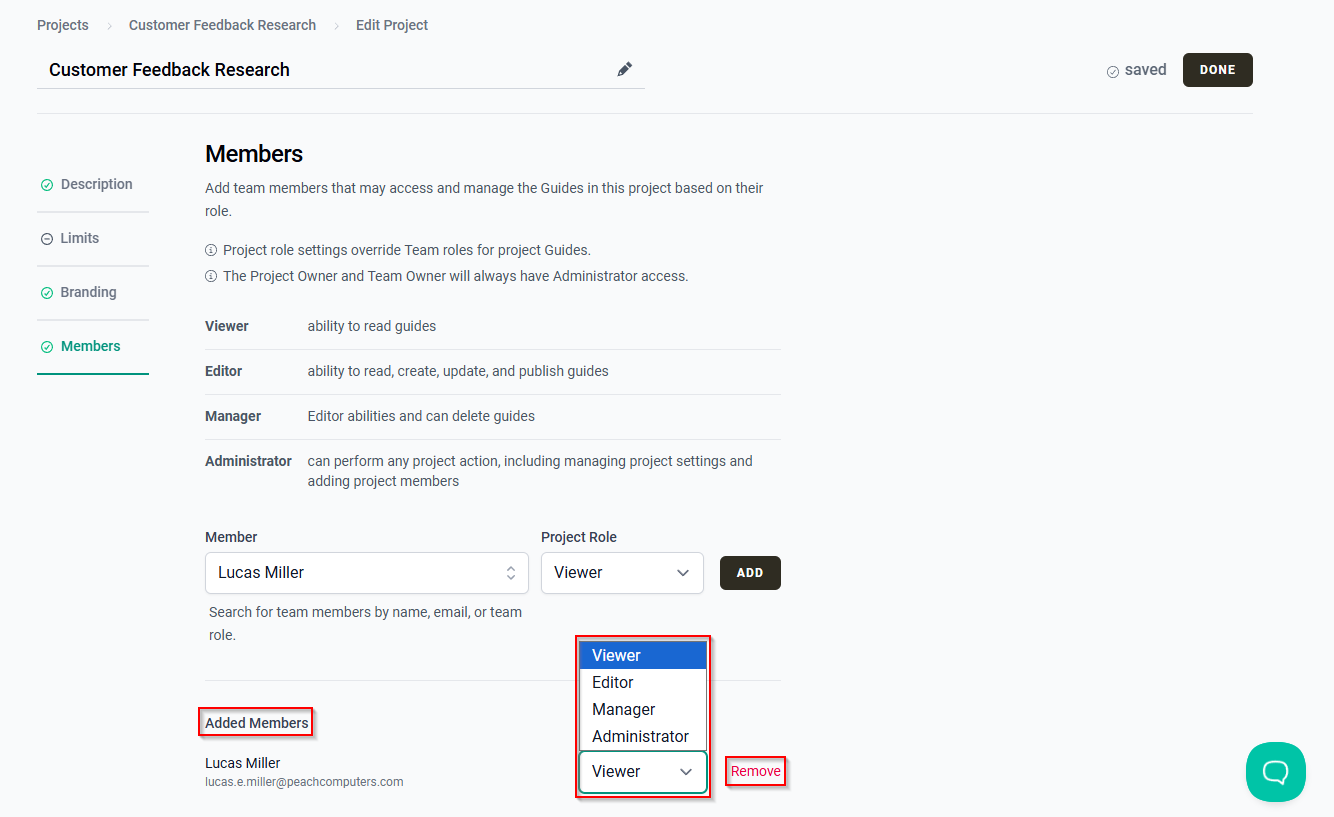
For more information about Project Roles and managing Project Members, see How to Manage Project Members.
Finish Editing
When you're finished making changes, select DONE to open the Project Overview.