
How to Embed a Public Chatbot
| Recommended Embed |
| Script Tag |
Optional Programmatic init |
| Troubleshooting |
A Public Chatbot lets you embed a Qualta interview directly on your website using a Public Token. The Public Token is added to your website's <script> or anchor <div> tag, allowing the Chatbot to load directly in the visitor's browser. No backend is required.
The Chatbot is pinned to a single Guide and can only run on domains configured as Allowed Domains. Because the Public Token is visible in your website's code, it is similar to publicly displaying a Guide's share link and should not be treated as a secret credential.
Public Chatbot interviews are rate-limited to help prevent abuse.
Recommended Embed
Add the Qualta script to the <head> of your page, then add the Chatbot anchor <div> before the closing </body> tag.
<head>
  <script src="https://cdn.qualta.io/qualta-interview.umd.js" async></script>
</head>
<body>
  <!-- … your site … -->
  <div
    id="qualta-interview"
    data-bot-token="pk_bot_xxxxxxxxxx"
    data-user-id="optional_user_id_from_your_app"
    ></div>
</body>
data-bot-token takes your Public Token and is the only required data attribute for initializing the Chatbot. You can find the Public Token on the Chatbot's edit page.
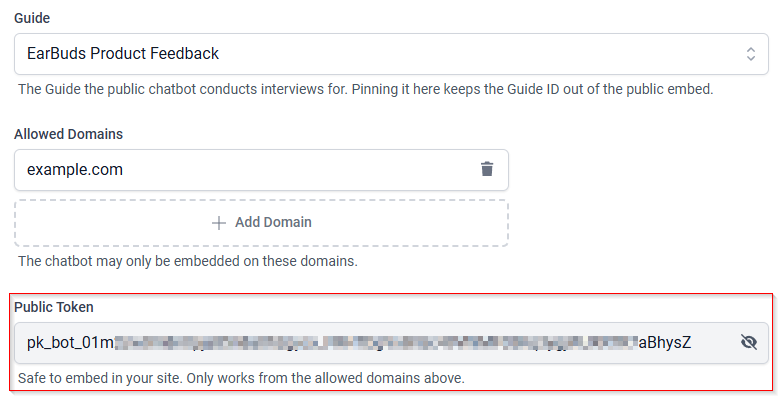
data-user-id is optional and can be used to uniquely identify an interview respondent and help prevent duplicate responses. If you don't provide a user ID, Qualta will make a best effort to prevent duplicate responses on publicly accessible Chatbots.
The Chatbot will appear on any page where the Qualta script is loaded and a valid Public Token is provided.
Script Tag
The anchor <div> is optional. You can configure the Chatbot using the <script> tag alone by placing it in the <head> or before the closing </body> tag.
<script
  src="https://cdn.qualta.io/qualta-interview.umd.js"
  data-bot-token="pk_bot_xxxxxxxxxx"
  data-user-id="optional_user_id_from_your_app"
  async
></script>
Optional Programmatic init
For more control over the Chatbot, you can initialize it programmatically using init(). First, add the Qualta script to the <head> of your page:
<head>
  <script src="https://cdn.qualta.io/qualta-interview.umd.js" async
  ></script>
</head>
Then, use init() to configure the Chatbot with options such as a userId and callbacks:
window.QualtaInterview?.init({
  botToken: 'pk_bot_xxxxxxxxxx',
  userId: 'optional_user_id_from_your_app',
  onClose: (ctx) => {
    // ctx: { userId, startedAt?, endedAt?, durationMs? }
    console.log('interview closed', ctx);
  },
  onFinish: (ctx) => {
    // ctx: { userId, startedAt?, endedAt?, durationMs? }
    console.log('interview completed', ctx);
  },
});
botTokentakes your Public Token and is the only requiredinitoption.userIdis optional and can be used to uniquely identify the respondent.onCloseaccepts a callback that runs when the respondent closes the interview by clicking “Not now”, the X button, or “No, thank you”. It fires once when the interview is dismissed or declined. It does not run when the respondent completes the interview normally; useonFinishfor normal completion.onFinishaccepts a callback that runs when the respondent successfully completes the interview at the final “Finish” step. It fires once on successful completion only. It does not run when the respondent closes or declines the interview; useonClosefor those cases.
Troubleshooting
When the Chatbot is embedded successfully, a Start Interview alert appears in the lower-right corner of the page.
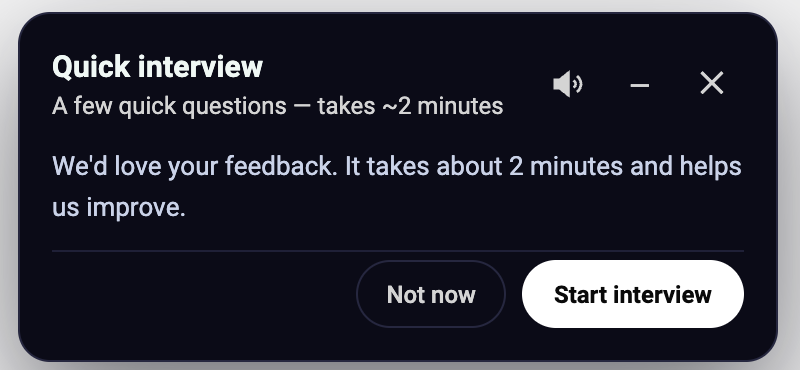
The Start Interview alert may not appear if the interview session token was not properly generated. You may identify session errors by navigating to the Chatbot's edit page in Qualta and clicking Logs to open the Token Usage screen. There, you can review the log entries and their status badges.
Each log entry has a status badge with one of the following labels:
| Badge Label | Description | Troubleshooting Steps |
| FORBIDDEN | The application is not properly configured. |
|
| QUOTA | The Guide is not active or an interview limit has been reached. |
|
| REPEATED | The respondent has already completed the interview. |
|
| ISSUED | Public session token successfully issued. | N/A |