
How to Embed a Private Chatbot
Generate a private session token (POST /bot/sessions) |
| Passing the Session Token |
A Private Chatbot (server-authenticated) lets you embed a Qualta interview directly on your website using a Secret Token to generate a short-lived session token. Your backend creates each interview session, then passes the session token to the frontend to initiate the Chatbot.
Private Chatbots provide the most control and are best suited to logged-in users or gated flows. They require a small amount of backend code.
Important: The Secret Token authenticates session creation for the whole team's Chatbot. Keep it server-side only — never put it in front-end code or a public repository. If it leaks, delete the Chatbot and create a new one.
Generate a private session token (POST /bot/sessions)
Your backend can generate a private session token by calling the POST /bot/sessions endpoint with your Secret Token. The session token is short-lived and is passed to the frontend to initiate the Chatbot.
Your Secret Token can be obtained from the Chatbot's edit screen.
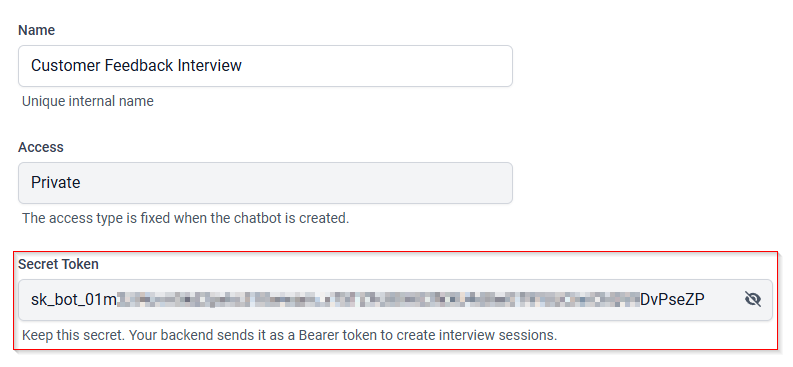
Request Details
Your backend sends a POST request to the following endpoint:
POST https://bot.qualta.io/bot/sessions
Include the following headers:
Authorization: Bearer <SECRET_TOKEN>Content-Type: application/json
The Authorization header authenticates the request using your Chatbot's Secret Token. The Content-Type header specifies that the request body is JSON.
Include the following parameters in the JSON request body. Parameter names use camelCase.
| field | required | description |
guideId |
Yes | The Guide to interview against (must belong to your team). See How to Find Resource IDs. |
userId |
No | Your own stable id for the end user. Ensures a person is interviewed only once per Guide. |
allowRepeatInterview |
No | Set to true to allow the same userId to be interviewed again. Defaults to false. |
cURL Example
curl -X POST https://bot.qualta.io/bot/sessions \
  -H "Authorization: Bearer sk_bot_xxxxxxxx" \
  -H "Content-Type: application/json" \
  -d '{
    "guideId": "01JABCDE...",
    "userId": "your-user-123",
    "allowRepeatInterview": false
  }'
Success Response (201 Created)
{
  "token": "…session token…",
  "route": "https://bot.qualta.io/bot/consent",
  "expiresAt": "2026-09-13T18:30:00+00:00"
}
After a successful response, pass the token to the Chatbot in the browser. The token drives the rest of the interview.
The session token is valid for one hour. If it expires, mint a new session token.
The POST /bot/sessions request must be made from your backend to keep the Secret Token private. After the session token is generated, subsequent steps are handled by the Chatbot in the browser.
Errors
403— The Secret Token is missing or invalid, or theguideIdbelongs to another team.403— The Guide isn't accepting interviews because it is not active, has exceeded its interview limit, or the team is out of interview quota.403— TheuserIdhas already completed the interview, unlessallowRepeatInterviewis set totrue.
Passing the Session Token
Now that you have a session token, you must pass it to the frontend to initiate the Chatbot. You may do this by dynamically supplying it to the data-bot-token attribute or using the global QualtaInterview object's init method.
Script Tag
You may configure the Chatbot with the <script> tag alone in the <head> or before the closing </body> tag.
<script
    src="https://cdn.qualta.io/qualta-interview.umd.js"
    data-bot-token="SESSION_TOKEN"
    async
></script>
The data-bot-token attribute takes the dynamically generated session token. It is the only required data attribute for initiating the Chatbot. The session token is passed from your backend.
The Chatbot appears on any page where the script is loaded with a valid data-bot-token.
Optional Programmatic init
After embedding the script in the <head>, developers can call init() for dynamic options, such as callbacks.
<head>
     <script
       src="https://cdn.qualta.io/qualta-interview.umd.js" async
     ></script>
</head>
window.QualtaInterview?.init({
  botToken: 'SESSION_TOKEN',
  onClose: (ctx) => {
    // ctx: { userId, startedAt?, endedAt?, durationMs? }
    console.log('interview closed', ctx);
  },
  onFinish: (ctx) => {
    // ctx: { userId, startedAt?, endedAt?, durationMs? }
    console.log('interview completed', ctx);
  },
});
botToken takes the dynamically generated session token. It is the only required init option.
onClose accepts a callback that runs when the respondent closes the interview. This includes selecting Not now or the X button to dismiss the interview, or No, thank you to decline consent. It fires once and does not run when the interview is completed normally; use onFinish for normal completion.
onFinish accepts a callback that runs when the respondent successfully completes the interview after the bot has no more questions, at the final Finish step. It fires once on successful completion and does not run when the respondent closes or declines the interview; use onClose for those cases.