
How to Create a Chatbot
| Create the Chatbot App |
| Private Setup (backend-authenticated) |
| Public Setup (embeddable, no backend) |
| Find Your Tokens and Usage Later |
A Chatbot is an AI interviewer that you can embed on your own site to conduct interviews with visitors.
When creating a Chatbot, choose between Private (server-authenticated) and Public (embeddable). The rest of the setup depends on this choice.
Private (server-authenticated) — your backend creates each interview session using a Secret Token, then passes a short-lived session token to the browser. This provides more control and is best suited to logged-in users or gated flows. It requires a small amount of backend code.
Public (embeddable) — a Public Token is placed directly into a <script> tag on an allowed-listed domain; no backend is required. The Chatbot is pinned to a single Guide, and because the token is publicly visible, this is similar to publicly sharing a Guide’s share link. Interviews conducted from Public access chatbots are rate-limited to prevent abuse.
Choose Private or Public carefully when creating your Chatbot. You cannot change the Chatbot from one access type to the other after it is created.
Create the Chatbot App
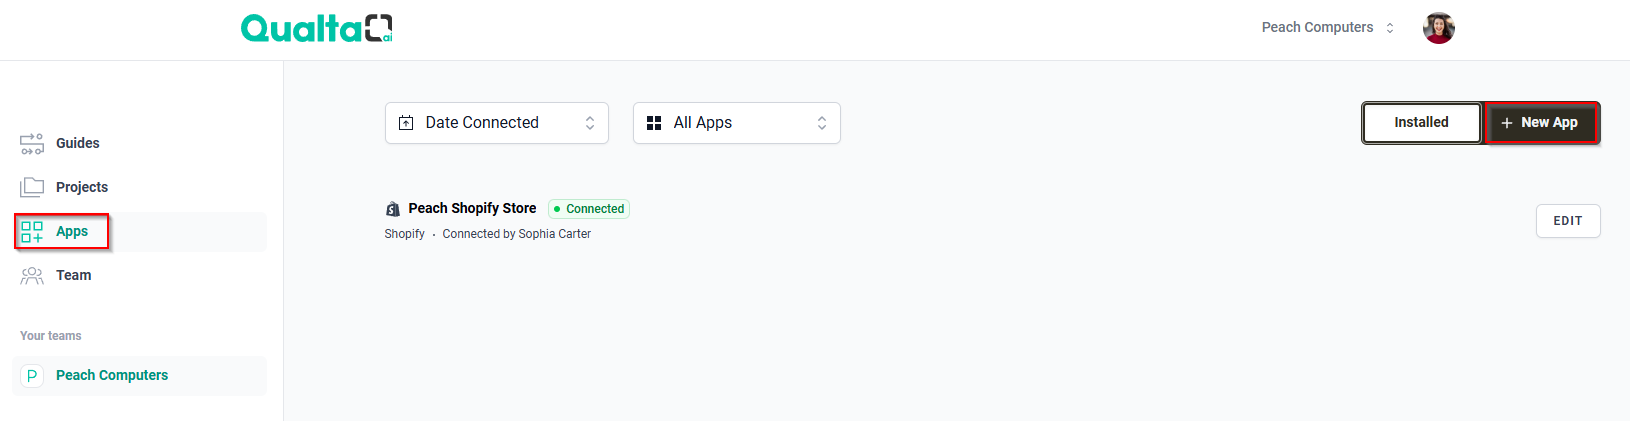
- In the main navigation, go to Apps and click + New App.
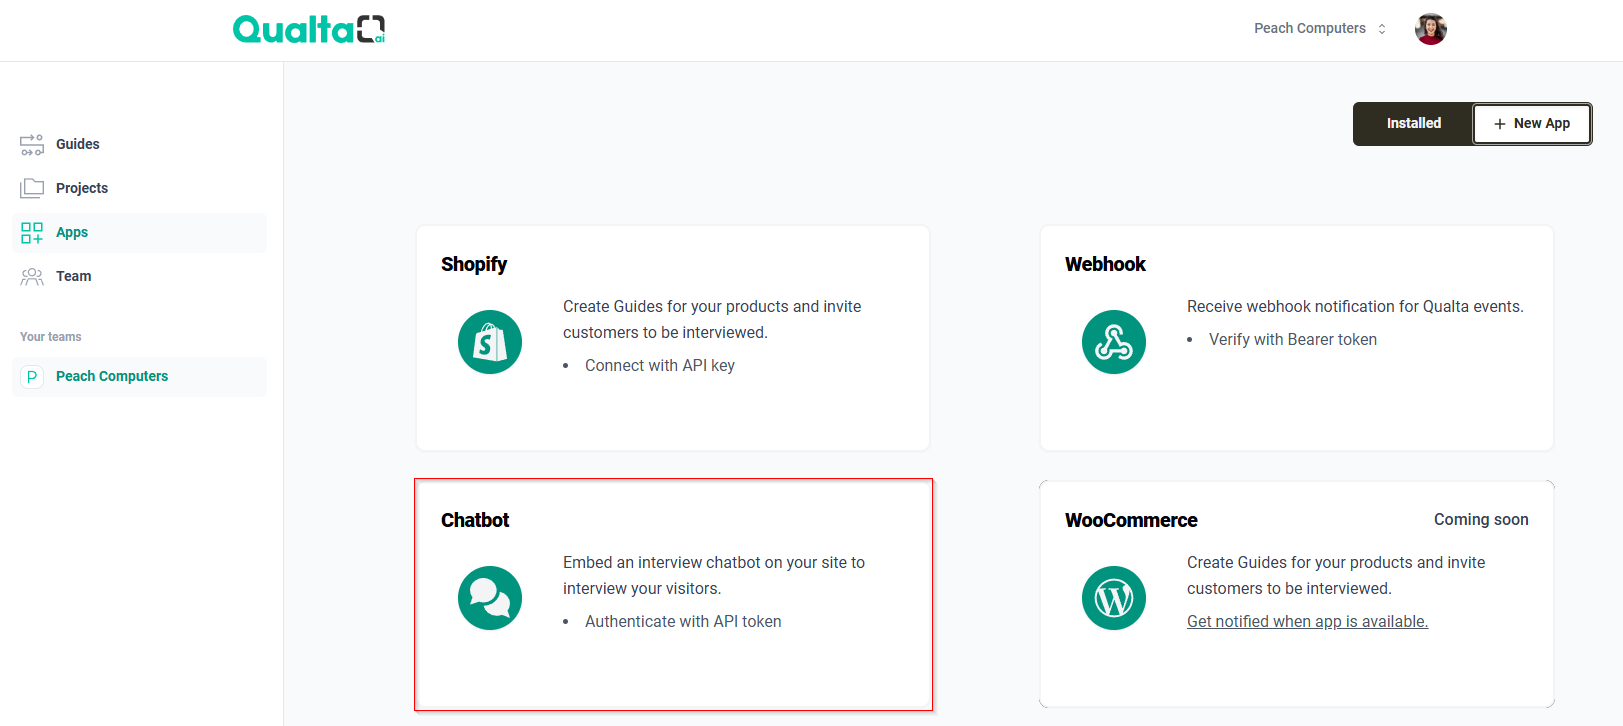
- Select the Chatbot card.
-
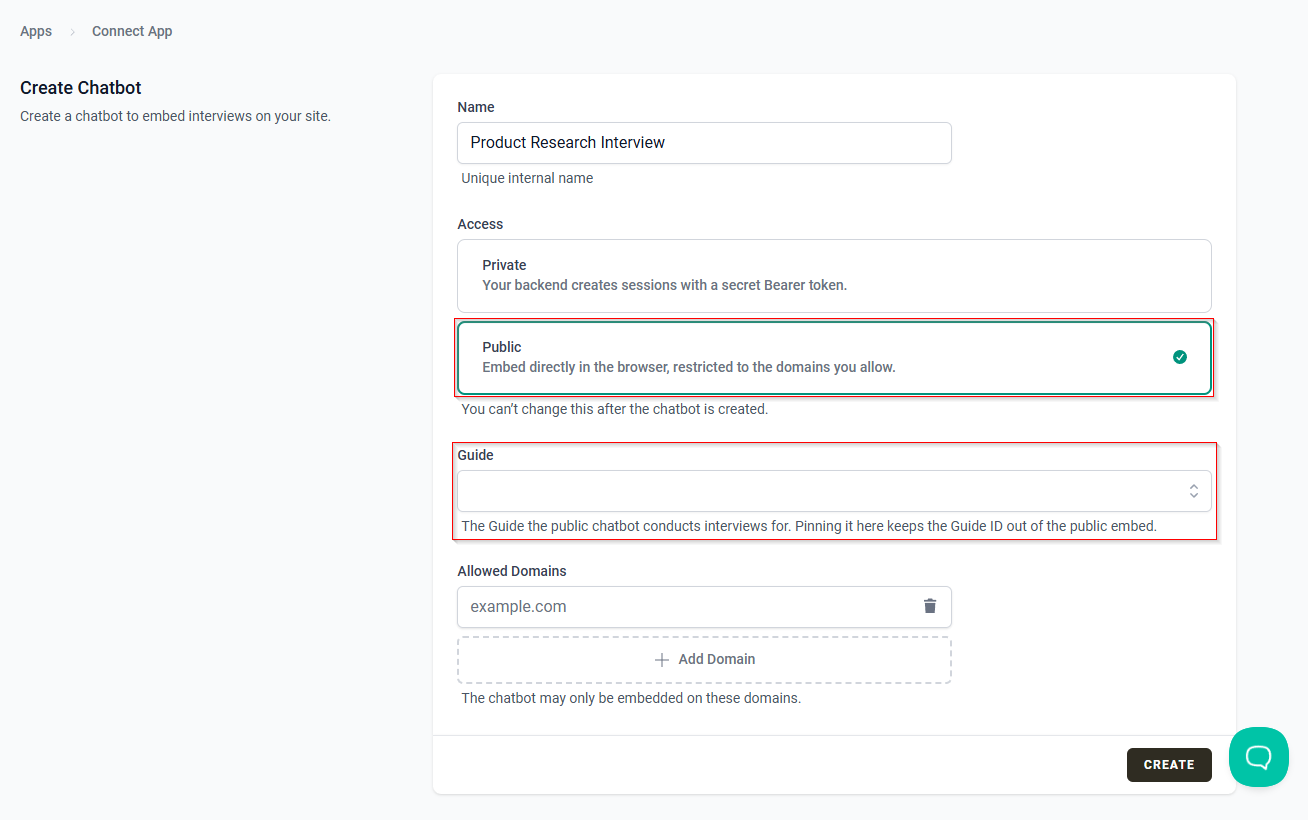
Enter a Name for the Chatbot. This is an internal label and must be unique within your team.
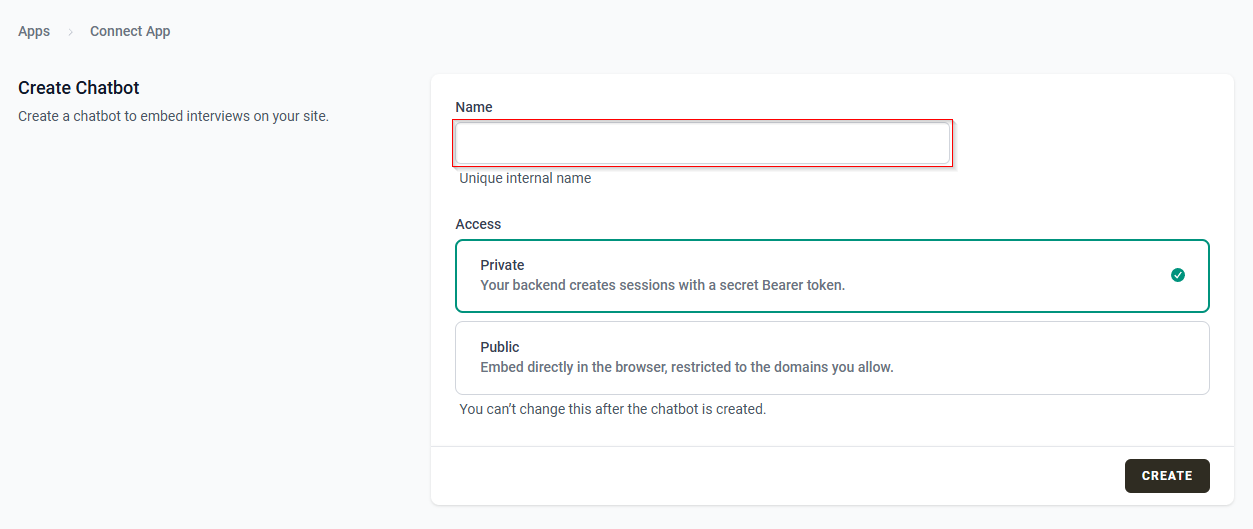
- Choose Private or Public.
- Private: Click Create. No additional fields are required.
- Public: Additional fields appear. Complete the Public Setup below.
The Chatbot creation form is minimal. Name is the only field always required. The Guide and Allowed Domains fields appear only when you select Public.
Private Setup (backend-authenticated)
Private is selected by default. No additional fields are required to create a Private Chatbot.
You don’t choose a Guide when creating a Private Chatbot. Your backend supplies the Guide for each interview session.
Once a Chatbot is created with the Private setup, it cannot be converted to the Public setup.
After you create the Chatbot, it opens on its edit page, where you can access the Secret Token.
- Reveal and copy the Secret Token (starts with
sk_bot_…).
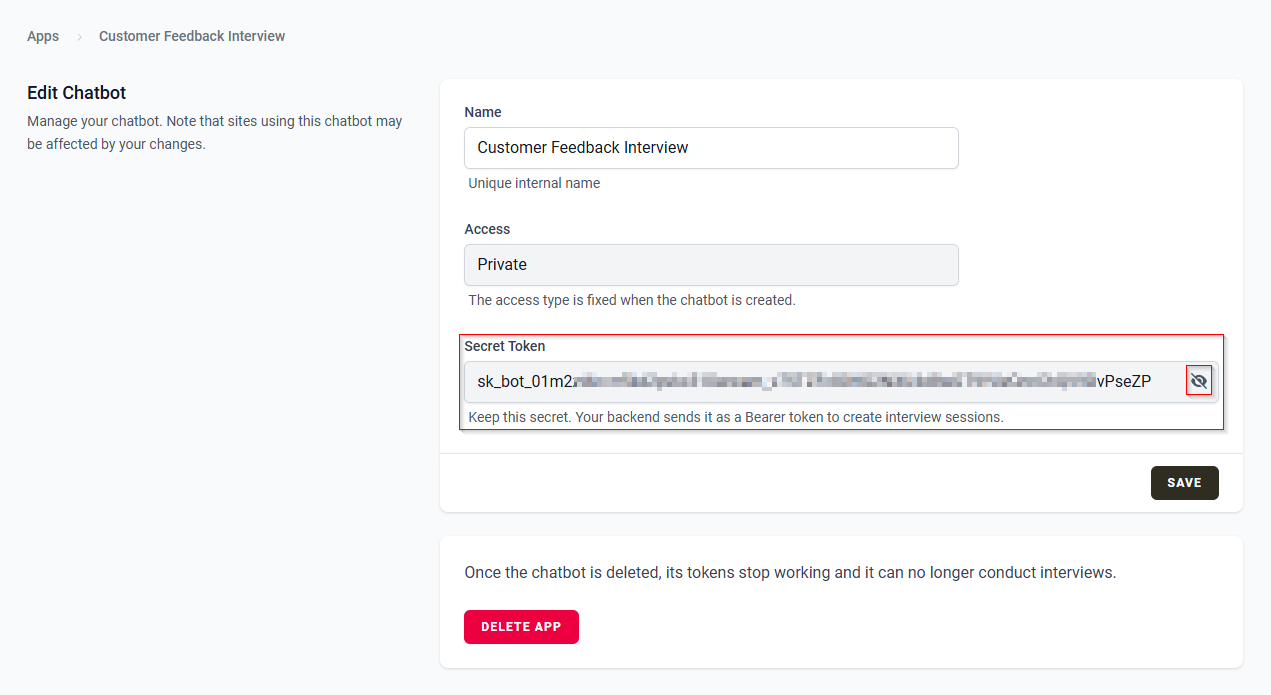
Important: The Secret Token authenticates session creation for the whole team's Chatbot. Keep it server-side only — never put it in front-end code or a public repository. If the token leaks, delete the Chatbot and create a new one.
To generate a private session token, go to the Generate a Private Session Token section in [How to Embed a Private Chatbot].
Public Setup (embeddable, no backend)
When you select Public, additional fields appear on the creation form.
- Choose a Guide in the Guide field. The field is searchable. The Public Token is pinned to this Guide, so the Guide ID does not need to be exposed in the browser.
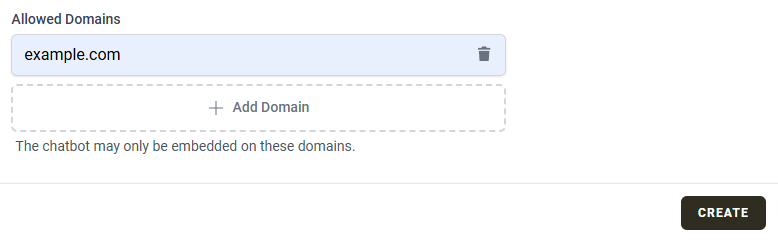
- Add one or more Allowed Domains using Add Domain. At least one domain is required. Enter bare hostnames such as
example.com. If you paste a full URL such ashttps://www.example.com/pricing, it is reduced toexample.com. The Chatbot will only run when embedded on the allowed domains.
- Click Create. The Chatbot is now created and opens on its edit page, where you can access the Public Token.
- Reveal and copy the Public Token (starts with
pk_bot_…). The Public Token is safe to embed.
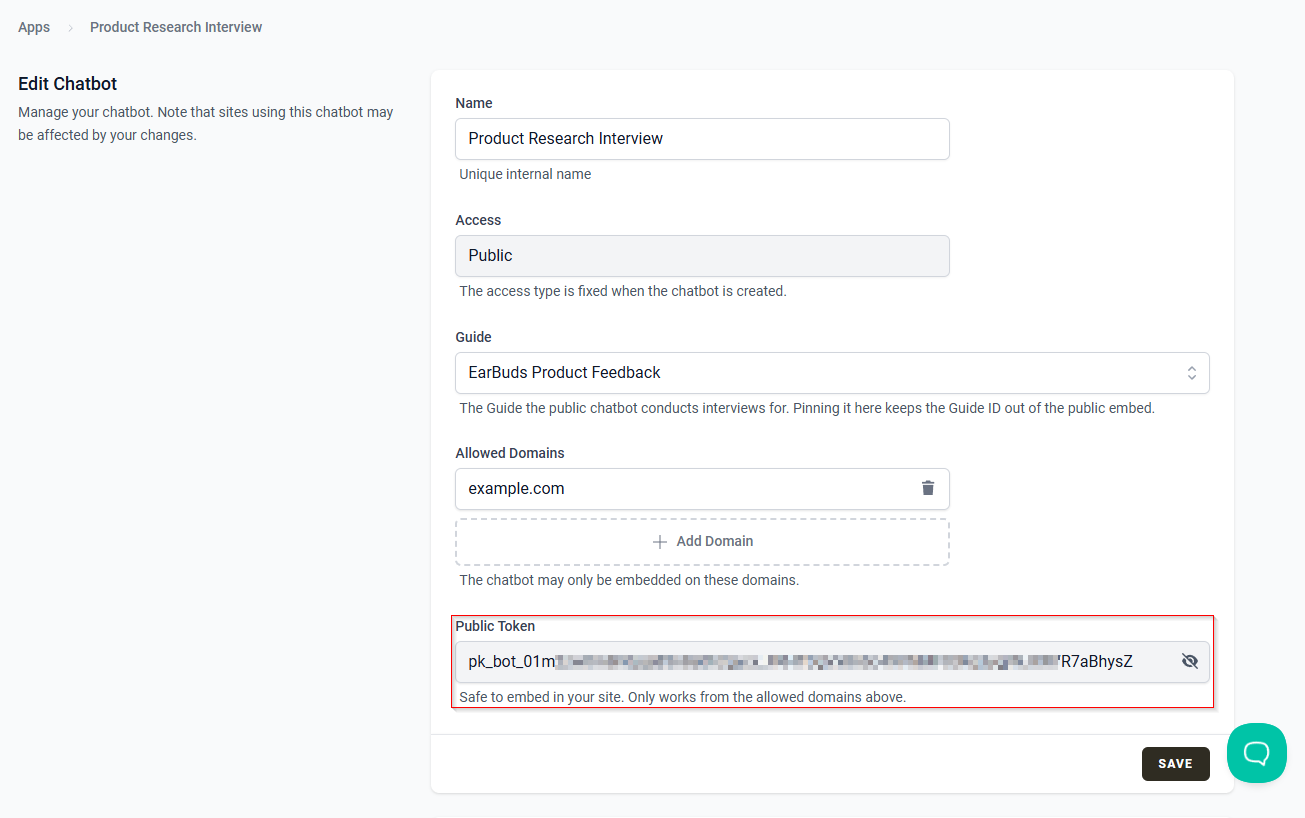
Once a Chatbot is created with the Public setup, it cannot be converted to the Private setup.
Find Your Tokens and Usage Later
On the Chatbot’s edit page, you can access the following:
- Secret Token / Public Token — reveal and copy the token for the Chatbot.
- Logs — view the Chatbot’s token usage, including sessions issued or denied.
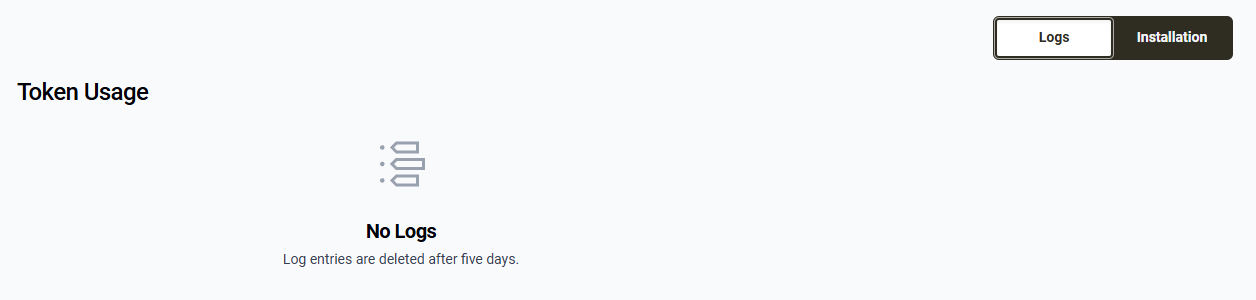
- Installation — access the embed and setup instructions for the Chatbot.
Note: Tokens do not rotate when you edit a Chatbot. Deleting the Chatbot immediately invalidates its tokens.
The key difference between the two setups is how the Chatbot is embedded and authenticated. Private Chatbots use server-side authentication and give you more control over how interview sessions are created. Public Chatbots can be embedded directly on an allow-listed domain without backend code.
To continue with embedding and managing your Chatbot, see: